Voice over IP (VoIP) have been captivated more users. Beyond are being offered by many domestic telecom operators, there are plenty of good services that ensure very competitive prices for our country.
Usually when it comes to having configured VoIP accounts on mobile devices, which are the most widely used local solutions always go through using external customers.
But what why not use the solution that Google already provides natively on Android? Let’s see how they can do it.

standard most services that offer VoIP accounts “force” users to install their own clients or to use some specific.
This solution is understandable because it allows advertising to be displayed to users or until they are controlled other factors.
But the truth is that Google has available within the Android SIP client, which can be used just like any other, with the advantage of being fully integrated with Android and not need an external or additional application.
How to set up Android Voip client?
To accomplish this configuration requires two very simple elements, any one of them essential.
The first is that they have access to a VoIP account. I have explained in previous articles as they can get, for example in the MEO service.
The second element is, as might be expected, is a smartphone with Android. Preferably a recent version, but that may well be the KitKat.
With these two elements can begin immediately to set up the account. Access to definitions vary from manufacturer to manufacturer, but it is not hard to find.
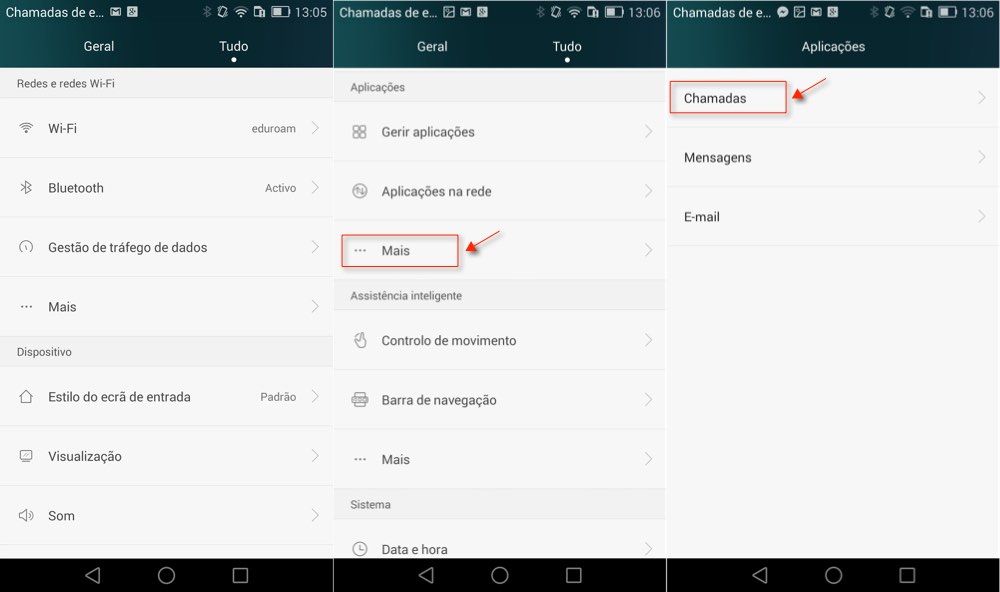
In the case of Android used for this guide (Huawei Kill 7), the access is made by the settings, then the option more, in the area of Applications . This access can also be done by the application settings or phone contacts. Well look in your Android. What they want to find are called settings.

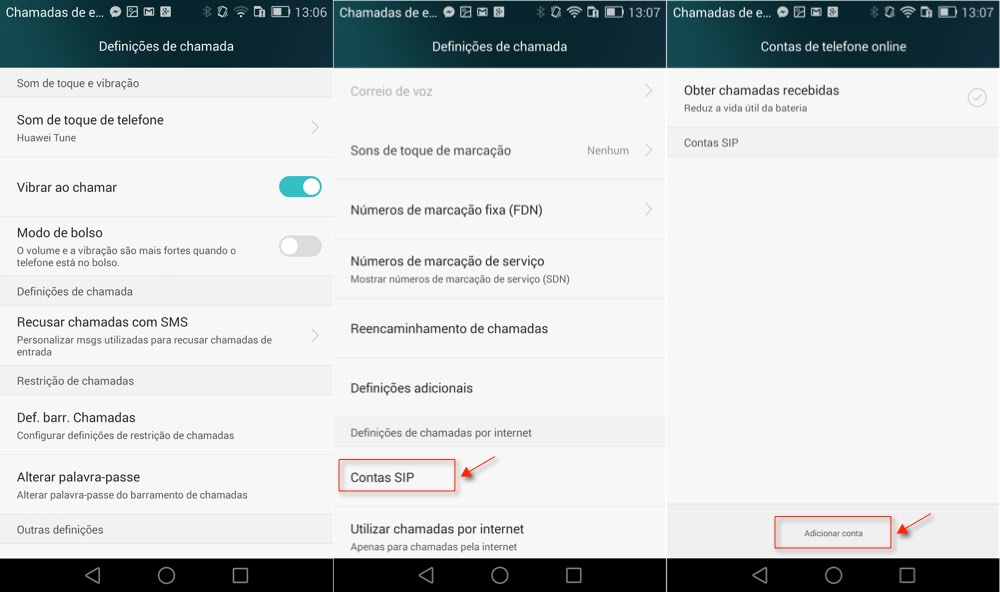
Once the call settings area must go through the menus and find the SIP Accounts . This is where they want to access and where they will set up your VoIP account.
When you open this menu are taken to the area where they can add, change or remove your SIP accounts that are configured in Android.
Since it will not take any account set up, should choose Add Account .

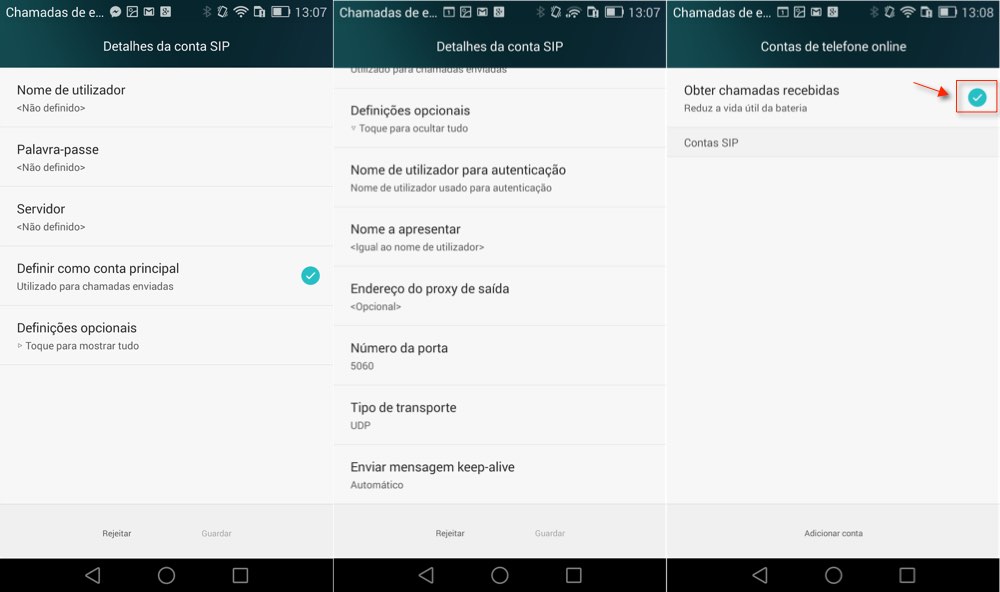
In the new account details will find all the courses they need to set up your account. Comply with the data necessary and essential for the Voip service they chose.
If you need there is a zone of extra settings where they can find some additional fields for a more fine grained configuration. In the end only need to save the account.
If you want to only perform the configuration calls end here. If on the other hand also wish to receive VoIP calls should select the option Get layers received , which is the area where access the list of configured SIP accounts. Note that using this option entails an additional power consumption and data.

From this moment on, and so the bill present a successful registration message, are able to carry VoIP calls directly from the application of Android calls.
How can they do to select the account you want to use? Simple, define the menu Call settings when they should be used. Typically the chances are for all calls , the Internet calls or, the most logical, prompt the user .
As you can see do not require any additional application, and it would only be consuming resources most of the time, to be able to use VoIP on Android. Just use the native Android client, ready to integrate with the application calls.
No comments:
Post a Comment