In a manga created in the 1980s for an animated series with three versions that was successful worldwide, the saga of Dragon Ball comes to Android Tuned, with complete customization for your Android.
Check out the complete walkthrough
Step 1: downloads required
To change the look of the operating system, we will need some applications beyond the exclusive content of Baixaki. Then, click the links to start the download:
Step 2: Place the files on the device
The exclusive content Baixaki can be downloaded to your computer or directly to your Android. If you download on your computer, use the USB cable to move the files to the device and access the internal memory of the device as a flash drive, copying and pasting the items in the desired location
But beware:. Case the download is done by Android itself, you need the MEGA application, official server program in which the files are hosted.
In both cases, you must use a file manager to access the content. We indicate the ES File Explorer, but you can download what you like best – as long as it has the function to unpack files. Once downloaded, create a folder on the device to make it easier to find items when customizing
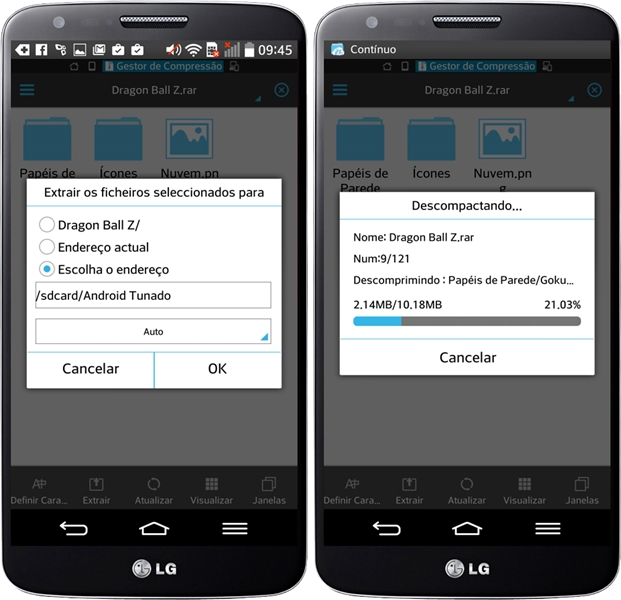
To unzip the files through Android itself, follow the following procedure:
- After downloading the file from our site, open the ES File Explorer and locate the content that possibly will be in the “Download” folder.
- Tap on the file and go to the “Extract” at the bottom the screen.
- Select the “Choose address”, tap on the “/ sdcard /” and create a new folder, named “Android Tuned”.
- Select . “OK,” and all the content is in this folder in the main root of your phone’s memory card
Step 3: Configuring the New Launcher
The New Launcher is the application that serves as a basis for our transformation, allowing multiple changes are made. It is available in Portuguese and is very simple to use, but if you have Android 4.0 or higher, you can opt for Holo Launcher (available from Android 2.3), with a very similar result.

Now, let the actions. The first step is to apply the default launcher. Tap the “Home” button, select the application and select the “Always” option so that the interface is accessed every time you return to the homescreen. Then go to application settings:
- Select the “Desktop” option, and “Grid desktop”, choose 9 “Lines” by 6 “Columns” <. /> li>
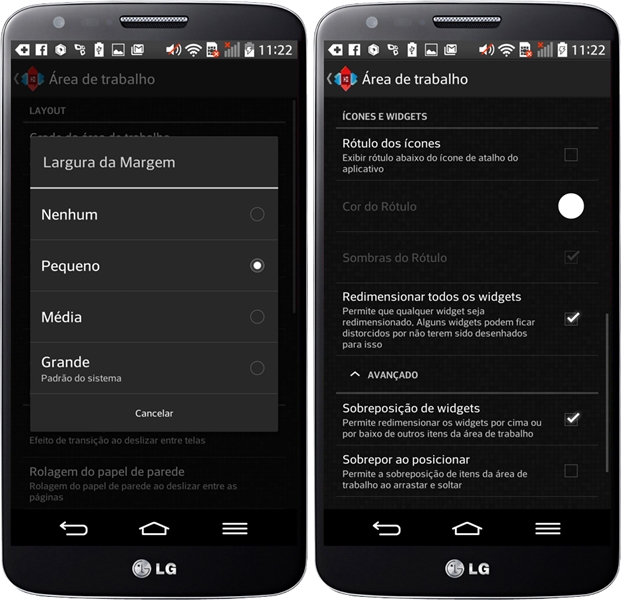
- In “Margin Width” and “margin height”, select the “Small”.
- In the “persistent search bar” option, select “None”.
- In “Home Screens”, remove all screens, leaving only two of them (do not delete the central screen to have no problems with the wallpaper). . To do this, select and drag the other to the “X” in the upper display
- ” Scroll “, go to” Scrolling Window “and check” No “.
- “Icons and Widgets”, clear the “Label icons” option. – hiding the name of each shortcut, leaving the visual cleaner
- “Advanced”, select “widgets Overlay” and “Override the position.”
- Go back to the home screen of Android and transfer the dock icons to the top of the homescreen.
- After that, return New to the menu Launcher, go to the “Dock” and uncheck the “Enable Dock”.
- Back to the settings screen, select “Appearance”.
- Disable the option “Show notification bar.” – this leaves the cleaner look, and the bar can be accessed whenever you slide your finger down
Before moving to the next step, go back to OS home and remove all content placed there by the New Launcher, leaving only the icons that were in the dock. . Tap on the icons and widgets until the “Remove” appears
Step 4: A new wallpaper
For this customization, we have several wallpaper options with key characters of all phases of the saga. You can use any of the images as Home of the background or lock screen. For the homescreen, follow these steps:.
- Touch the screen for a few seconds and select “Wallpaper”
- To locate the file faster, since Device image gallery may be full, open the ES File Explorer file manager.
- Select the “Android Tuned” folder that you created earlier in the tutorial, and choose the “Desktop Wallpaper “and the desired image.
- In the court option, choose the mode” Portrait “and adjust the cutting to get all sides of the image.
- Complete the operation by selecting” OK ” .
 >
>
Step 5: new icons
In the folder of files that you downloaded, we have two folders with icons, with references to the franchise. Before choosing the style of the shortcuts, you must select which apps you want as a shortcut on the Home, in addition to options Dock – we will stand on the top screen. Follow these steps:
- To enter multiple applications at once on the screen, tap the first option for a few seconds until the message “Selected” on the top of the display.
- Now choose the desired apps. All icons will appear at the top of the screen. . Place them one by one, in order to become more practical for you

After all the shortcut options were included in the Home, it’s time to change the image of each . The process is as follows:.
- Touch the icon for a few seconds and select the “Edit” option
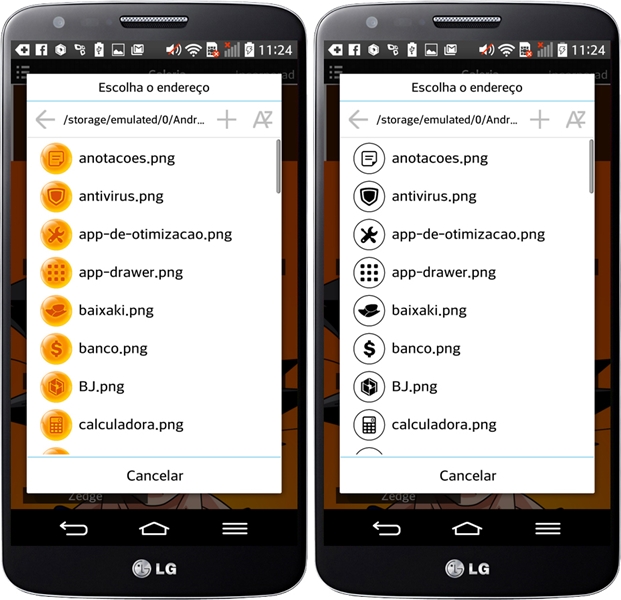
- Tap on the icon image and select the file manager ( ES File Explorer in this case).
- Select the folder of images you downloaded and put on Android, according to the image you want to use.
- Select the icon for the application and tap “OK”.
- Complete the operation by selecting the button in the upper left corner of the editor.
Step 6: Watch
For the watch, we will use the UCCW application with a unique skin, made by TecMundo team:.
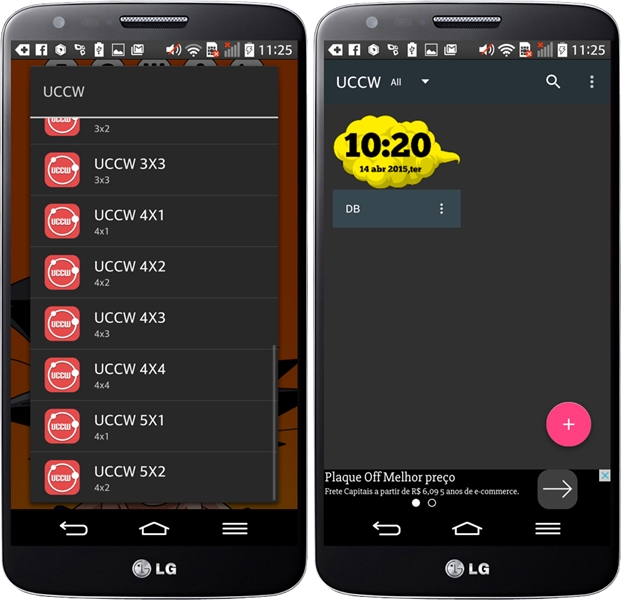
- Touch the screen for a few seconds and select “Widgets”
- “UCCW “Choose size” 4×2 “.
- Select the button in clip format, in the bottom right corner of the screen.
- Open the Android Tuned folder and select the file “db.uzip”.
- It will be loaded and will appear in the list of app options. Tap on it to insert it on the screen.
- Let’s put it just below the new dock icons above the character’s image.
Step 7: ringtones
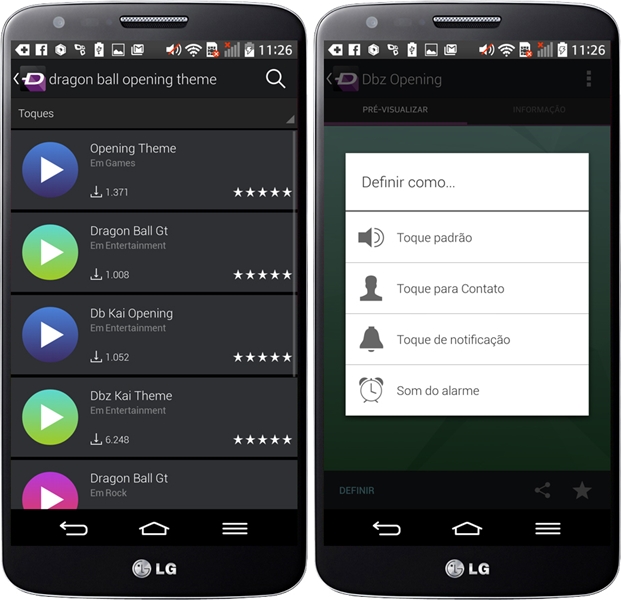
For phone ringtone, we will use the app ZEDGE Ringtones & amp; Wallpapers. To search and apply the files, follow these steps:
- Open the application and, in the search tab, type “Dragon Ball” – for more specific audio, we suggest seeking “Dragon Ball opening theme” , or Z and GT phases.
- In the tabs “Ringtones” and “Notifications”, the app will show different file options.
- Choose the “Play” button to listen to the file.
- To select the file, tap on it and the “Download” option.
- Then select “Set” and the options for general touch (“Standard ringtone”) touch to a specific contact (“Contact ringtone”), notification ringtone (“Notification ringtone”) or alarm (“Alarm sound”).
Step 8: new lock screen
For a new lock screen, we will use the Lock Screen Club app. Before you begin, you must disable the standard Android lock screen:.
- Access Android settings and select “lock screen”
- In the “Security check “screen, select” None “.
Now, you must create an account on the Service or sign up through Facebook. Just after making the login, you are ready to start:.
- Open the application sidebar and select the “Create Subject” option
- Tap the first button on the bar top to add an image.
- Select one of the wallpapers in Android Tuned folder.
- In the “+” button, select “Add Watch”.
- Select the “Stylish” option.
- “Appearance” in “Primary Colors” and “Secondary Color”, let the content in white.
- In “Alignment”, choose “Left”.

- In the” size widget “, select” Half size “.
- Set the clock to the image you chose from background.
- Complete the operation by tapping the in the upper right of the display button.
- Select any part of the image to capture a photo and save your new theme.
- Give a name to the lock screen and finish the operation.
- On the next screen, tap on the image of the new lockscreen and select the “Use” option to apply the new lock screen.
Step 9: ending
To complete the customization, we will stop the work area, preventing the content come off accidentally:
- Access New settings Launcher and select “Desktop”.
- In the “Advanced” option, check the “Lock Desktop”.
Do not forget that you can reverse all the customization process very simplified form, back to your original launcher operating system. Simply uninstall the New Launcher, and it will remove all changes, leaving only the wallpaper

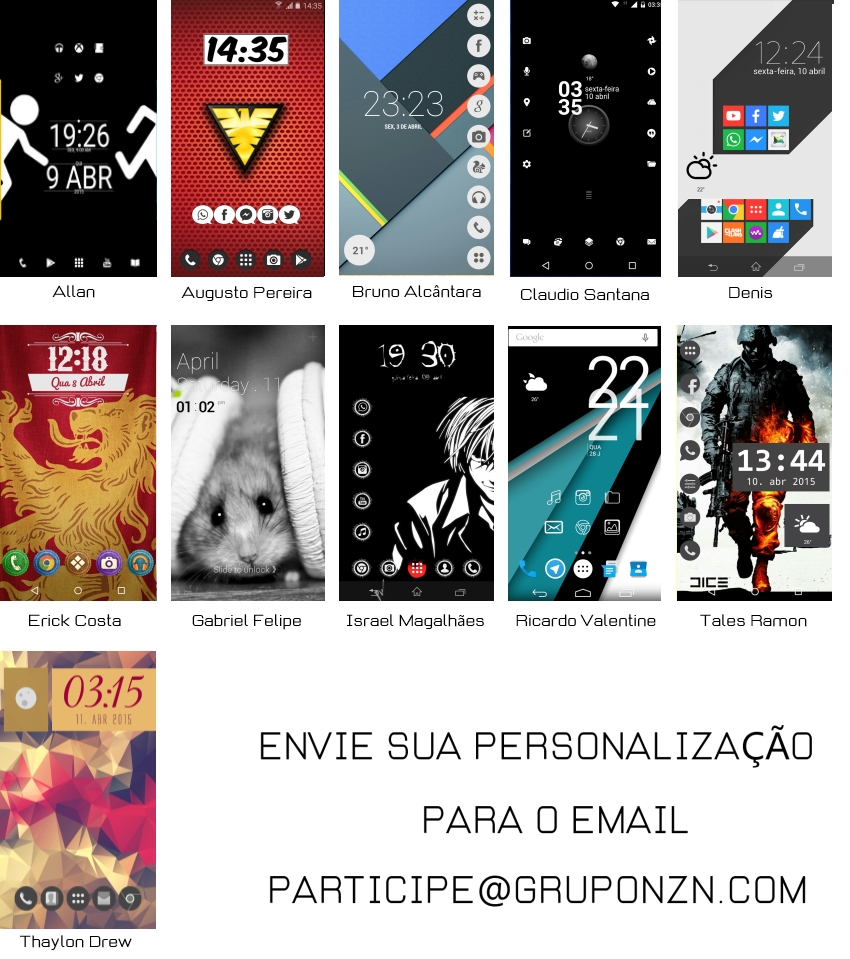
Have your personalization for us
You can also send your customizations to us, be it done with the help of Android Tuned or your creation. Send a screenshot for email participe@gruponzn.com, as did readers below:
We’re done here another Android Tuned. Stay tuned to our channel for more customizations. Until next time!
No comments:
Post a Comment